It is well documented that many 3rd party lenses on the Sigma SD1M produce colour casts in the corners of the images. This is also true (though the effect is quite mild) for the RZ67 lenses that I have been using (Link to Article). I have developed a very simple work flow which neutralises the colour cast very effectively, and thought I would detail it here in case anybody else would find the method useful. In its simplest form I have used a cheap ‘Mennon white balance lens cap’ to obtain a ‘grey card image’ at the same f-stop as the image that needs to be corrected (and as a special requirement for the RZ67 lenses also focus distance, since focusing an RZ67 lens significantly change the distance between lens and sensor) and a post processing program that can work with layers and has an ‘Invert Filter’ i.e. Photoshop.
At the Scene:
Having set up the SD1M for the shot at the chosen f-stop and focus distance (whether the focus distance is also important for other lenses or not I cannot say), I use the menu to set the white balance (Mennon lens cap in place) and use the Q Menu to set the camera white balance to custom. I then take the corrected ‘grey card shot’ with the lens cap still in place ensuring the histogram shows a nice peak at the midpoint of the range (adjusting shutter speed / exposure compensation as required). Having set the white balance I take the desired image – if I decide to adjust the f-stop I simply put the lens cap back on and take another ‘grey card shot’. Whilst this sounds a little tedious it actually does not take very long to get used to routinely doing this. (NB: it is not actually necessary to use the custom white balance but the closer the colour balance is to that desired for the final image, the less chance that processing discrepancies between the target image and the grey card may degrade the final ‘neutralisation’).
It is also not necessarily a requirement to take the grey card images at the scene. If the white balance at the scene is routinely set to the correct ‘custom white balance’ it is actually quite possible to take a series of grey card shots a priori (or posterior) (at each f-stop) and use these as ‘stock’ adjustment layers since the grey card images themselves are adjusted to neutral as part of the workflow. It simply requires a little discipline to set the in camera f-stop to that of the 3rd party lens on the SD1M so that the data will be recorded in the X3F file. This is more difficult for the RZ67 lenses where focusing changes the distance of the lens the the sensor and therefore the degree of colour cast in the corners of the image.
In SPP
The desired target image is opened and adjusted as appropriate and to taste and saved as 16 bit ProPhoto Tiff – Noting the settings for Saturation, White Balance, Colour Mode and Chroma Noise Reduction.
The corresponding grey card image is then opened and set to the same Saturation, White Balance, Colour Mode and Chroma Noise Reduction as the intended target image. The colour adjustment eye dropper is then used to set the middle of the grey card image to neutral and the exposure adjusted to ensure the average value for R, G and B in the centre of the image is approx. 128 (Loupe Tool in SPP 5.5.3 / Information Window in SPP 6.0.4). Setting the centre of the card image to neutral ensures that the method does not introduce a change to the global white balance of the target image.
(Aside: If both image and grey card are shot with the ‘wrong’ white balance the global white balance of the target image can be neutralised along with the false colour in the corners by NOT neutralising the centre of the grey card with the colour adjustment tool.)
I routinely set the luminescence noise reduction for the grey card image to 3 (mid point) to avoid introducing new noise into the target image and save the grey card image also as 16bit ProPhoto Tiff.
The grey card image from the RZ67 50mm ULD @ f22.

IMPORTANT: at the time of writing a correctly shot neutral grey card will return values of approx. 128 at the centre of the image when opened with SPP 5.5.3 (which will also be confirmed in Photoshop for the resulting Tiff) HOWEVER: the same X3F file will show values of approx. 147 (an apparent 0,3 stop ‘over exposure’) when opened in SPP 6.0.4. This value is wrong and if the exposure is adjusted by -0.3 to show a ‘correct’ value of approx. 128 the resulting grey card Tiff will be under exposed. The displayed RGB values for a SD1M X3F RAW file in SPP 6.0.4 imply the image is approx. 0.3 stops more exposed than the image actually is – this discrepancy has been reported to Sigma.
In Photoshop:
Both images are opened as separate files and an Invert Filter applied to the grey card image.
Here the inverted greycard image from above:

The inverted grey card layer from the grey card image is dragged and dropped (whilst holding the shift key to ensure 100% alignment) onto the target image. The layer blend mode of the inverted grey card layer is then adjusted to ‘overlay’ and ‘et voilà!’. Fine adjustment of the effect is achieved by adjusting the opacity of the inverted grey card layer.


Uncorrected (far left) and corrected (left) detail from the left edge of a shot with the RZ67 50mm ULD lens. The recovery of the correct green in the leaves of the trees and the neutralisation of the magenta cast in the ‘blown-out’ sky can be clearly seen.
The shot was actually taken to try and trigger CA on the branches from the bright sky behind the lens. However the lens is ‘too’ well corrected!
At this point I combine the layers to a single layer, save the adjusted Image as a new Tiff (16bit ProPhoto) and start the normal process of applying final corrections / polish to the image by re-opening the newly adjusted Tiff in Photoshop via Camera Raw.
As a nice addition the inversion process also effectively removes any residual vignetting that the lens might have produced irrespective of whether the colour was correct or not.
Conclusion
For me the method is a very simple, quick and extremely effective addition to my workflow and simply requires that I am disciplined enough at the scene to take the appropriate ‘grey card images’, which, since it actually only means taking a shot (at the correct f-stop) before I remove the lens cap, is really not so hard. In any event, since I have already taken the step of using a 3rd party lens on an Sigma SD1M then it is clear that generally I don’t mind if life is just ‘a little bit harder’ than normal!


And here to finish real world examples taken with the RZ67 lenses on the Sigma SD1M, where as in the sky (50mm) the magenta can clearly be seen, with the corn flower / poppies (110mm) the ‘incorrect’ colours (far left) at the top and bottom of the image, are more subtle and not immediately obvious. (Click on the image to open a larger view)
The corn flower / poppies image was taken with firmware 1.08, the sky / clouds with firmware 1.09.
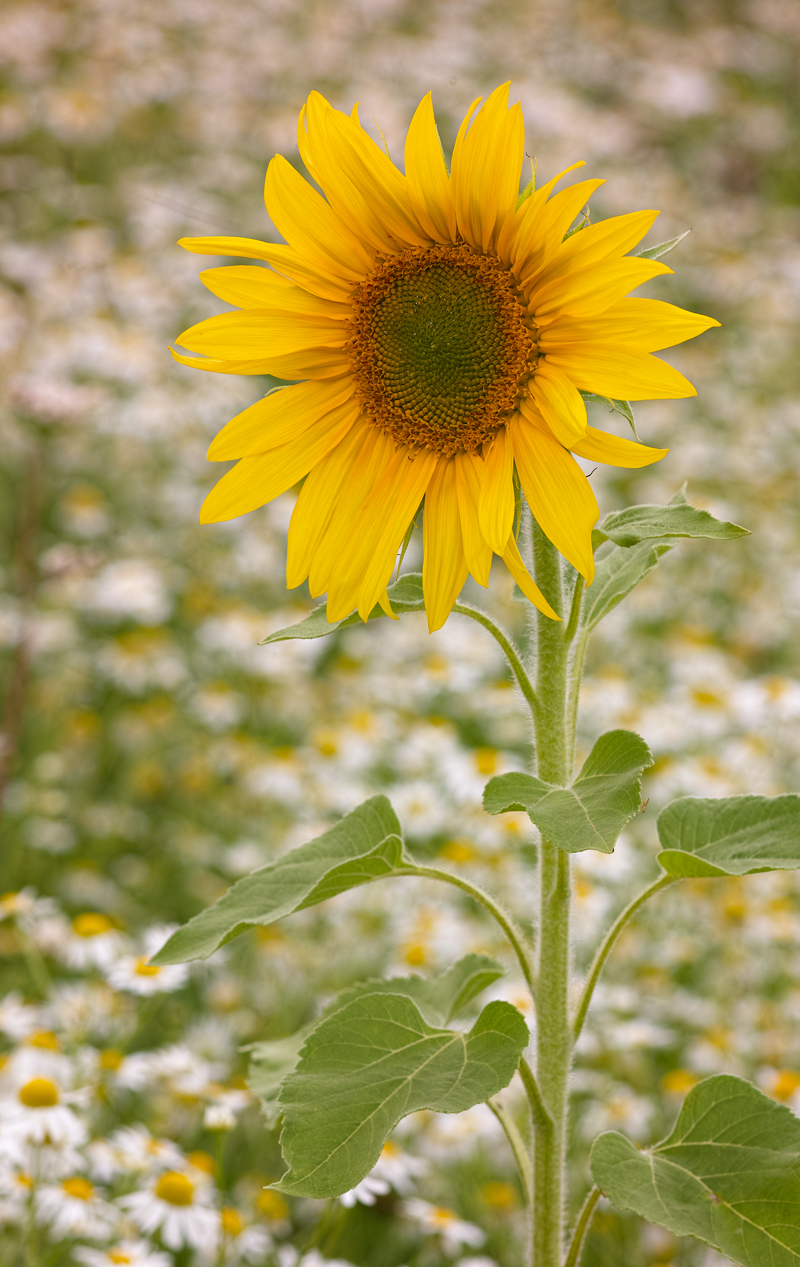
Roll-over the sunflower image (bottom) to reveal the corrected image:
SD1M / Fotodiox Z67-Pentax-K Adaptor / RZ67 140mm.